
Workflow - Return Portal Light
To better understand the integration requirements for using the Return Portal Light, please review the workflows outlined below.
The Seven Senders Return Portal Light requires only the standard Seven Senders integration for Orders and Shipments. If you have already completed this integration, the Return Portal is ready to use. If not, this guide outlines the required steps to connect to the Seven Senders API and enable the Return Portal Light. For customers to use your Return Portal Light, an Order and a corresponding Shipment must first be created in our system. Once both records exist, customers can log in to your Return Portal using their order number and email address to initiate a return.
Before calling the API, you must be authorized and have access to your API token.
Step 1: Create an Order
Orders are created via the POST /Order endpoint. The order_id represents the order number that customers must enter, together with their email address, to access the Return Portal. Ensure this value matches the order number communicated to the customer.
The order_id is required for log-in.
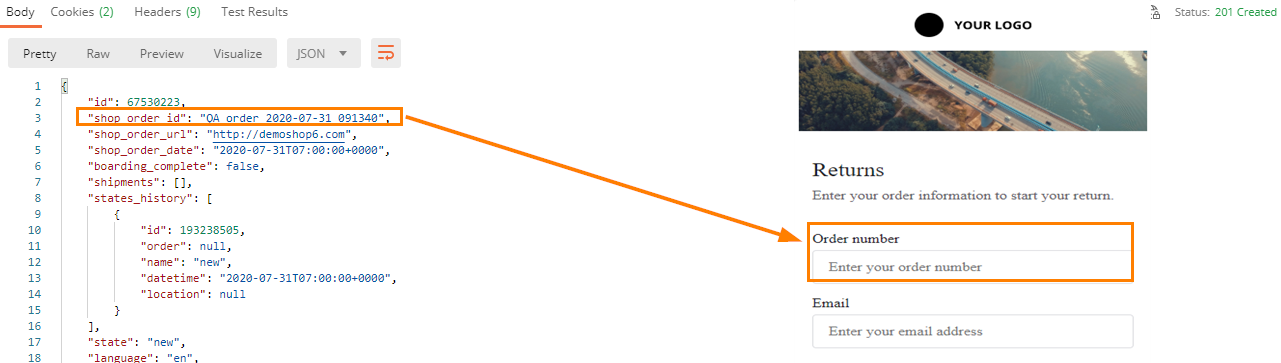
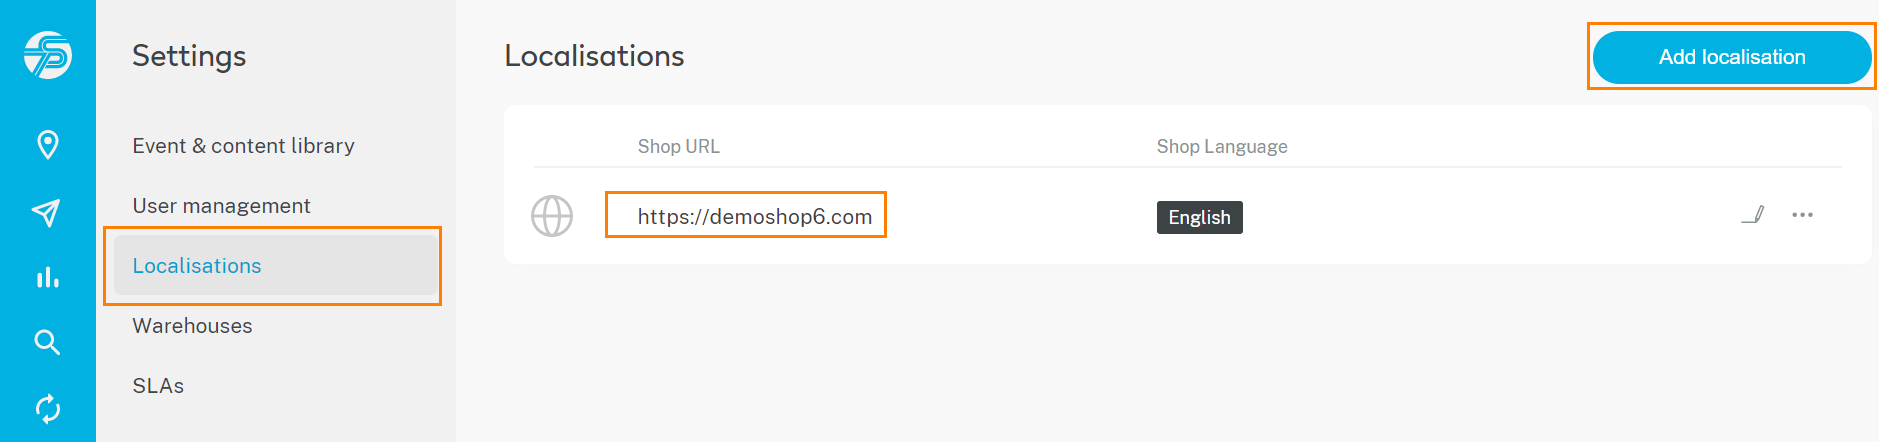
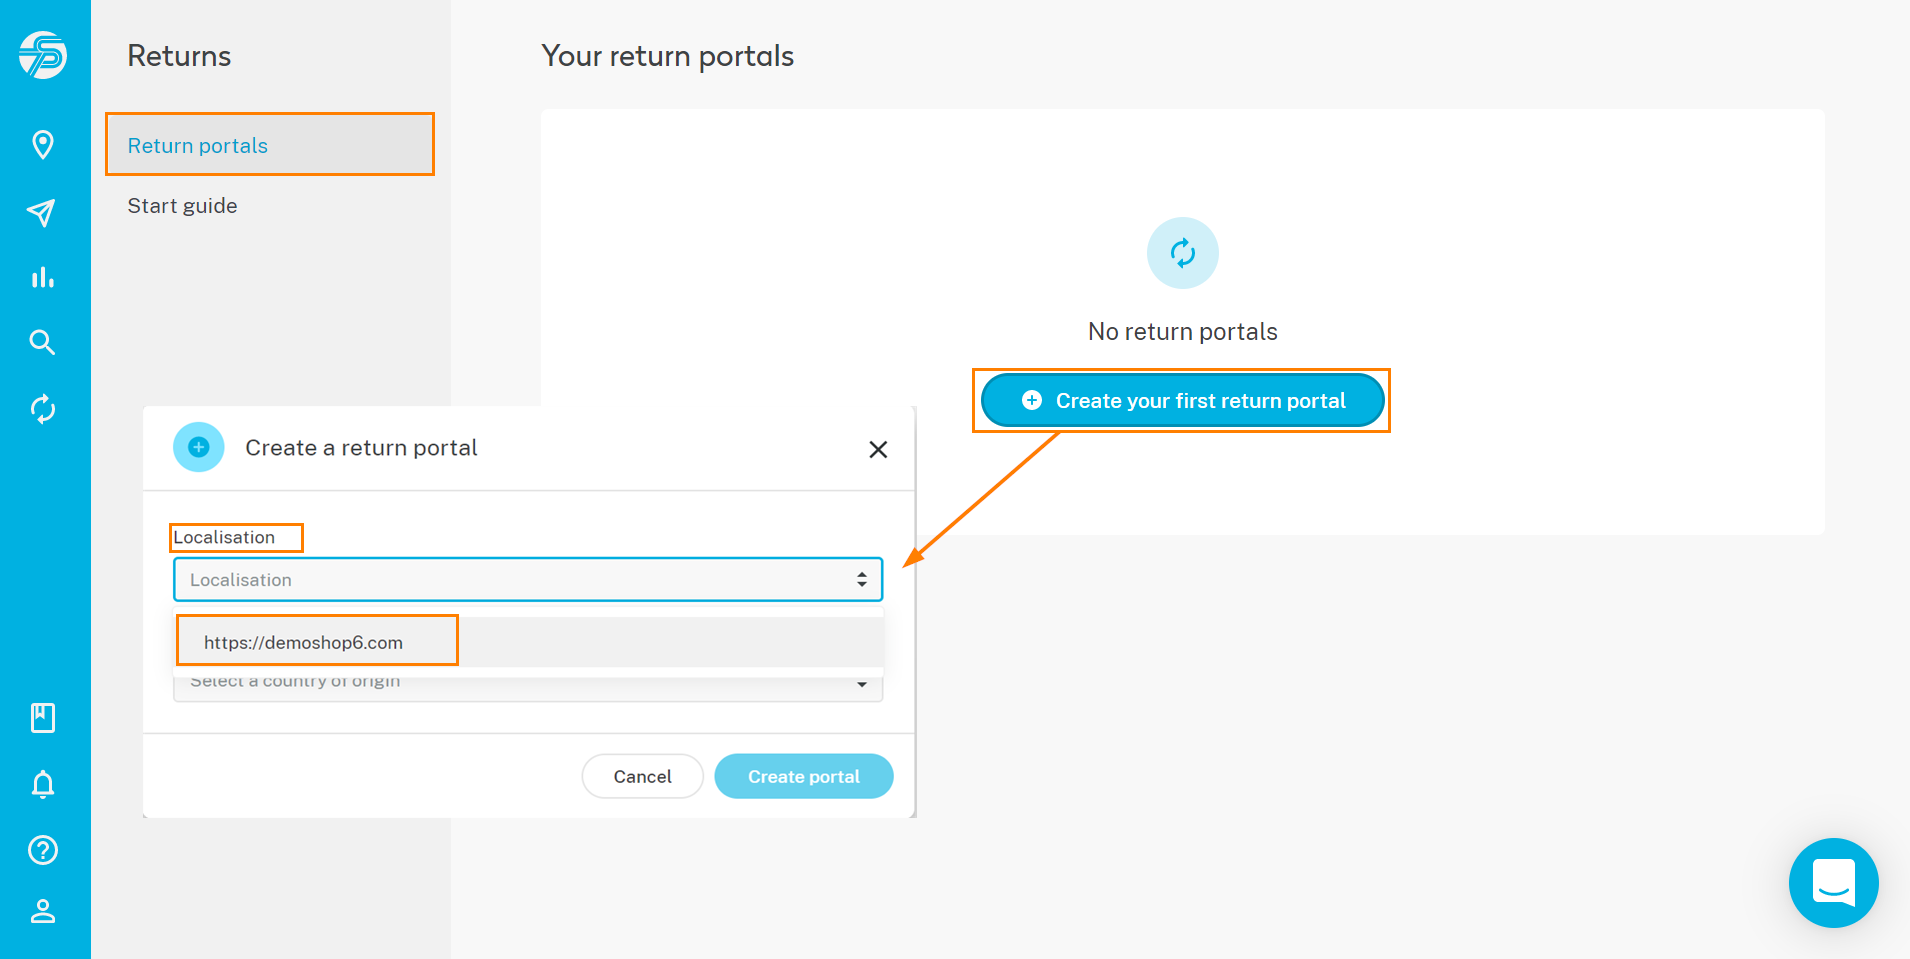
Optionally include order localisation (URL and language) for portal mapping.
Available Languages
- bg; cs; da; de; el; en; es; et; fi; fr; ga; hr; hu; it; lt; lv; mt; pl; pt; ro; ru; sk; sl; sv & uk
Parameter Reference
| Field | Type | Format / Example | Required | Description |
|---|---|---|---|---|
| order_id | string | "QA_order_2020_07_31_091340" | Yes | Unique order reference in your system. |
| order_url | string (URL) | "https://shop.example.com" | Recommended | URL of the shop where the order was placed. Used for localization mapping. |
| order_date | string | "2020-07-31T07:00:00+00:00" | Yes | Order creation timestamp in ISO-8601 format (UTC recommended). |
| boarding_complete | boolean | false | No | Indicates whether all shipments of a multi-parcel order have been imported. |
| language | array[string] | ["en"] | Recommended | Customer language or shop language. Required if email/SMS notifications are triggered. |
| order_tags | object | {"tag_1": "test"} | No | Custom tags or properties for order segmentation and filtering. |
| promised_delivery_date | string | "2020-08-05T07:00:00+00:00" | Recommended | Promised delivery timestamp communicated to the customer (ISO-8601). |
Example JSON Payload
{
  "order_id": "QA_order_2020_07_31_091340",
  "order_url": "https://shop.example.com",
  "order_date": "2020-07-31T07:00:00+00:00",
  "boarding_complete": false,
  "language": ["en"],
  "order_tags": {
    "tag_1": "test"
  },
  "promised_delivery_date": "2020-08-05T07:00:00+00:00"
}
Step 2: Create a Shipment
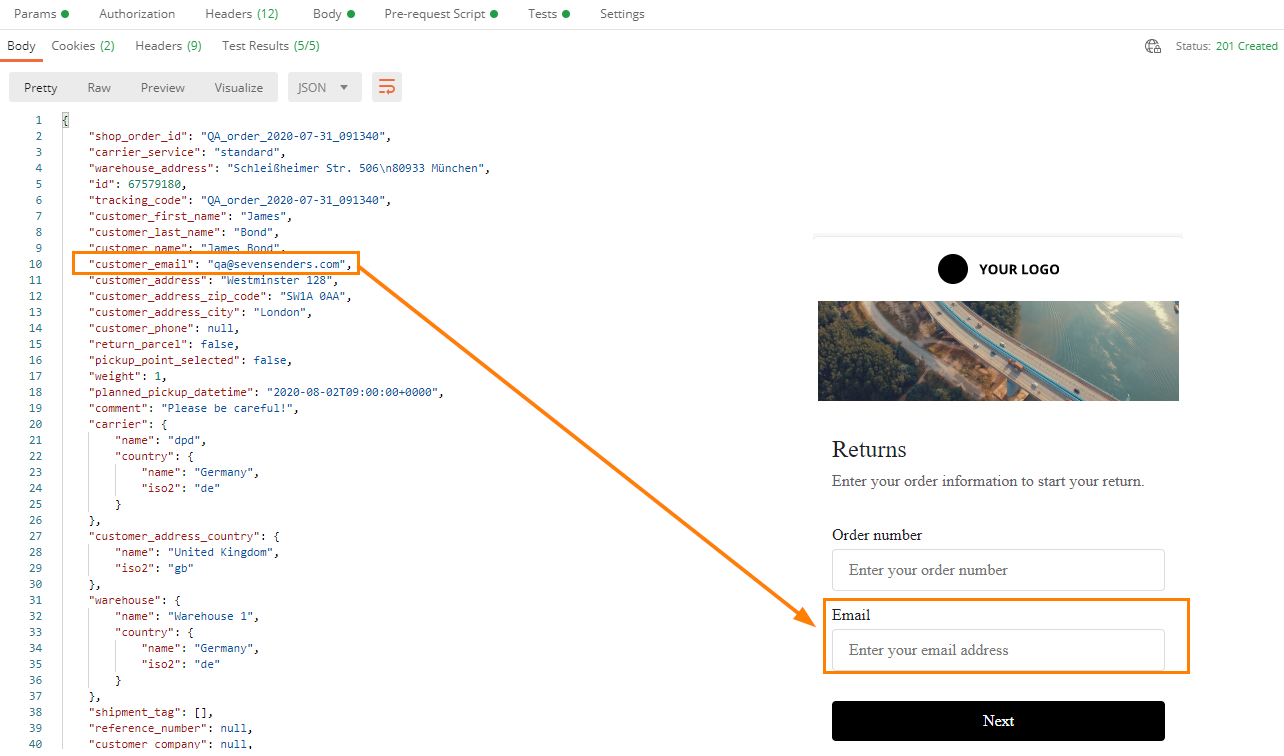
Shipments are created via the POST /Shipment endpoint. The customer_email field must contain the recipient’s email address. This email, together with the order_id, is required for customers to log in to the Return Portal.
Step 3: Push Shipment Events (Optional but Recommended)
Shipment events can be created via the POST /ShipmentEvent endpoint. To ensure full visibility of the return lifecycle, we recommend sending the following return-related events:
- Returned to warehouse – When the returned parcel has arrived at your warehouse
- Refunded – When the refund has been processed for the order
Providing these events enables complete tracking of the return process and improves transparency for both merchants and customers.
Updated 2 days ago